
Recently, Showit introduced an exciting update that allows users to add custom class names to elements. This opens up endless customizations and styling possibilities.
Hover to expand image is a subtle yet effective animation that can enhance the visual appeal of your site, especially for photography portfolios showcasing families and babies.
This tutorial will guide you through the process of implementing the hover to expand image effect.
Step-by-Step Guide:
Step 1: Add the following code to the Custom CSS box under Advanced Settings tab of your page in the Showit builder:
.hover-to-expand .se-img {
  transition: transform 0.8s ease-in-out !important;
}

.hover-to-expand:hover .se-img {
  transform: scale(1.1) !important;
  transition: transform 0.8s ease-in-out !important;
}
Step 2: Add the classname “hover-to-expand” (notice that it is without the period ‘.’ in the front. Showit adds that for you.) to all the images on your page that you want to expand on hovering.
How to Add a Custom Class Name to Your Showit Elements:
Click on the image. You will see a new “Advanced” tab on your right hand side settings panel.
Under this Advanced tab, you will see a CSS Classes option

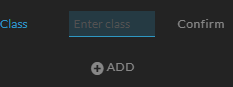
Click on the Add button, and enter the class name here, and click on confirm.
Changing animation speed and size of the images on hovering:
Change the speed of animation in this line. The default value is 0.8 seconds.
transition: transform 0.8s ease-in-out !important;
Change the scale of the image in this line. The default value is 1.1, which means the image grows to 1.1x times its current size.
transform: scale(1.1) !important;
Play around with the values to see what fits your needs the best!
If you are facing any issues with implementation, We also have a video tutorial here!
And we’re done!
By following this simple tutorial, you can easily add a hover-to-expand image effect to your Showit website, enhancing its visual appeal and providing a more interactive experience for your visitors. This subtle animation is particularly effective for photography portfolios, allowing your images to stand out and captivate your audience.
With the ability to customize the animation speed and scale, you can tailor the effect to perfectly suit your design preferences. Don’t forget to experiment with different values to find the ideal look for your site.
Hi there! This was extremely helpful! I was wondering if there is a fix to the affect this custom css has when a photo is horizontally locked? When I add this class to a photo and horizontally lock it to the left for example, when I hover, the photo expands but also moves to the right. Thanks so much for the tutorial!
Hi Tess!
The post has been updated with new instructions and code!
Simply replace your old CSS with this one:
.hover-to-expand .se-img {
transition: transform 0.8s ease-in-out !important;
}
.hover-to-expand:hover .se-img {
transform: scale(1.1) !important;
transition: transform 0.8s ease-in-out !important;
}
And that should work on horizontally or vertically locked images!