
Looking to add a dynamic, eye-catching element to your Showit website? An infinite marquee is a perfect way to showcase important announcements, promotions, or just add a bit of flair to your design. In this tutorial, we’ll walk you through three simple steps to create a smooth, continuous scrolling marquee that grabs your visitors’ attention and keeps them engaged. Whether you’re a seasoned web designer or just getting started with Showit, this guide will help you effortlessly implement this stylish effect on your site. Let’s dive in and get that marquee moving!
Step 1
Add a Text Box
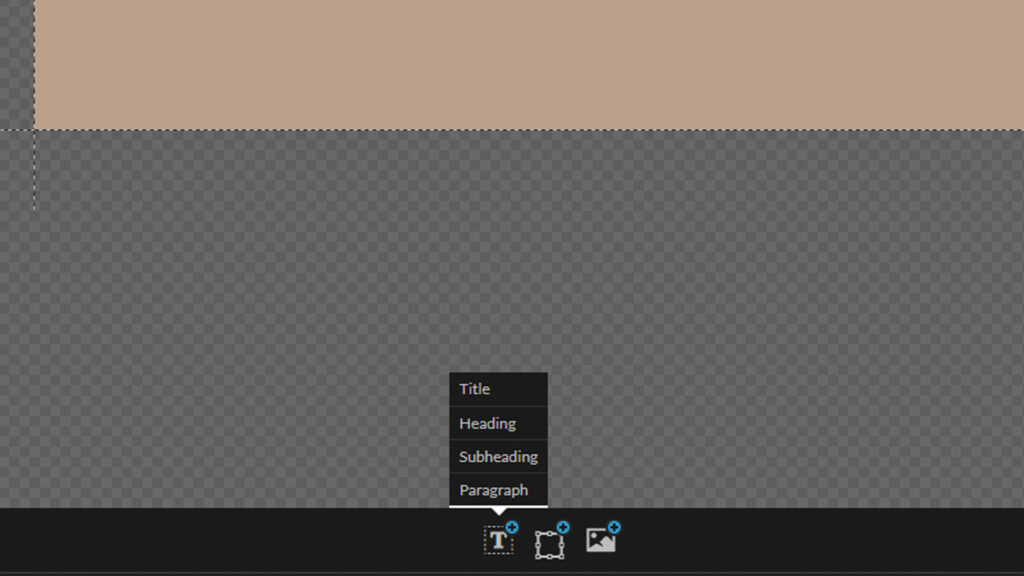
Any text box is fine! Click the “T” icon at the bottom bar of your Showit builder and add a text box according to your preference.
Step 2
Style Your Text Box
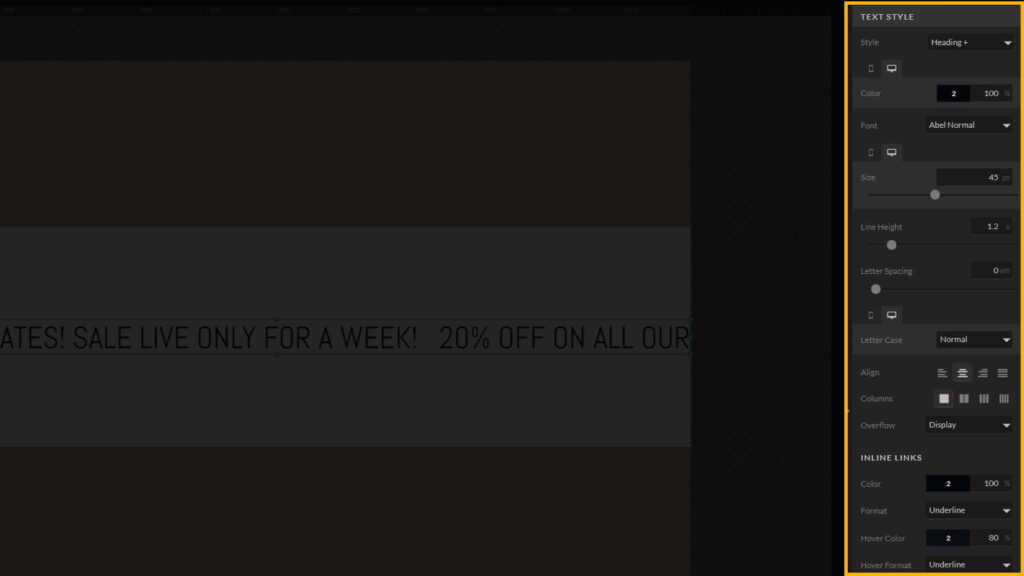
Use the default text style settings in the Showit builder to customize your text box.
*PRO TIP
Now is a perfect opportunity to ensure your text box is sized and optimized for mobile devices. You can easily adjust the text box size to fit your preferences on both desktop and mobile screens. If you want to create a full-width banner on the desktop version, remember to select the horizontal stretch option in the sizing menu of your Showit builder.

This is simply an example, yours sizing settings dont have to be exactly the same.
Step 3
Add CSS Code
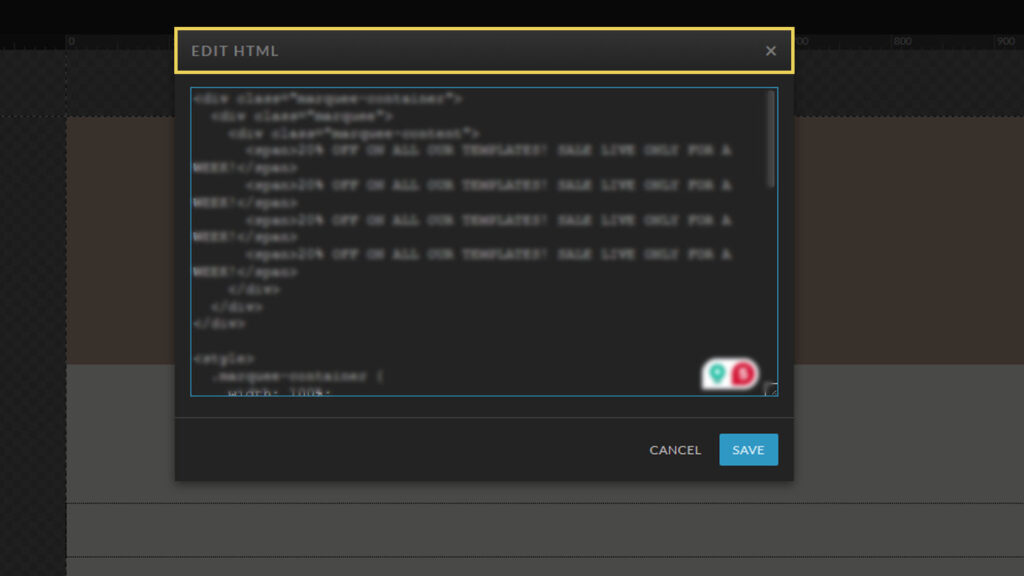
Hold the ALT key on your keyboard [Option key on mac] and double click your text box.
This opens the HTML Editor for this text box.
Copy and Paste the following code into the HTML Editor
<div class="marquee-container">
    <div class="marquee">
      <div class="marquee-content">
        <span>YOUR AWSOME MARQUEE BANNER MESSAGE GOES HERE</span>
        <span>YOUR AWSOME MARQUEE BANNER MESSAGE GOES HERE</span>
        <span>YOUR AWSOME MARQUEE BANNER MESSAGE GOES HERE</span>
        <span>YOUR AWSOME MARQUEE BANNER MESSAGE GOES HERE</span>
      </div>
    </div>
  </div>

  <style>
    .marquee-container {
      width: 100%;
      overflow: hidden;
      white-space: nowrap;
      box-sizing: border-box;
      position: relative;
    }

    .marquee {
      display: flex;
      white-space: nowrap;
      position: relative;
      animation: marqueeAnimation 16s linear infinite;
    }

    .marquee-content {
      display: inline-block;
      white-space: nowrap;
    }

    .marquee-content span {
      display: inline-block;
      padding-right: 20px;
    }

    @keyframes marqueeAnimation {
      from {
        transform: translateX(0);
      }
      to {
        transform: translateX(-50%);
      }
    }
  </style>
Find these lines of code and replace the text between the <span> and </span> with your own text that you want to feature on the marquee.
        <span>YOUR AWSOME MARQUEE BANNER MESSAGE GOES HERE</span>
        <span>YOUR AWSOME MARQUEE BANNER MESSAGE GOES HERE</span>
        <span>YOUR AWSOME MARQUEE BANNER MESSAGE GOES HERE</span>
        <span>YOUR AWSOME MARQUEE BANNER MESSAGE GOES HERE</span>
You can change the slow down or speed up the marquee by changing the duration in this line in the code:
animation: marqueeAnimation 16s linear infinite;
After making these changes click on the “SAVE” button.. Remember to set a click action on the text box!
All done!
And just like that, you’re all done! You’ve successfully created an infinite marquee in Showit, adding a unique, attention-grabbing element to your website. With just a few simple steps, you’ve enhanced your site’s visual appeal and created a dynamic way to highlight key information. Whether you’re showcasing announcements, promoting special offers, or simply adding a touch of creativity, your infinite marquee is now ready to impress your visitors. Keep experimenting, and don’t be afraid to get creative with how you use this fun feature on your Showit site!
If you liked the post, share it with your fellow ShowIt designers and developers. You can leave a comment if you have questions/suggestions.
Follow me on Instagram